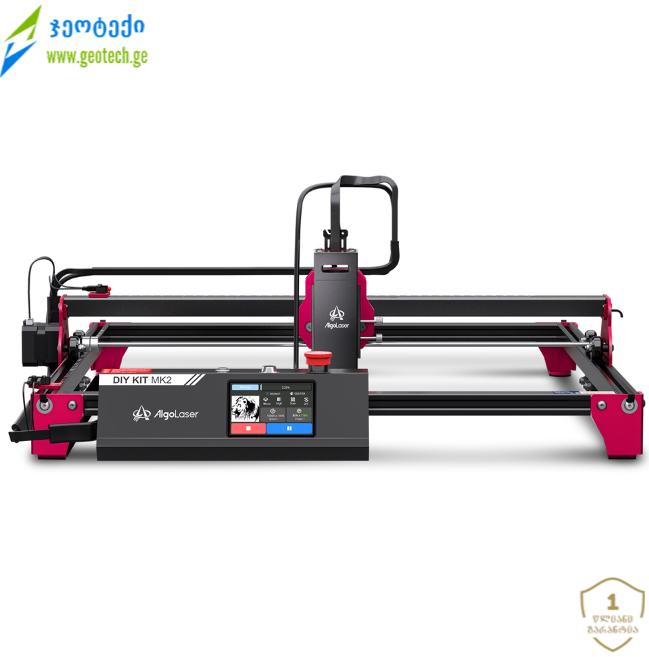
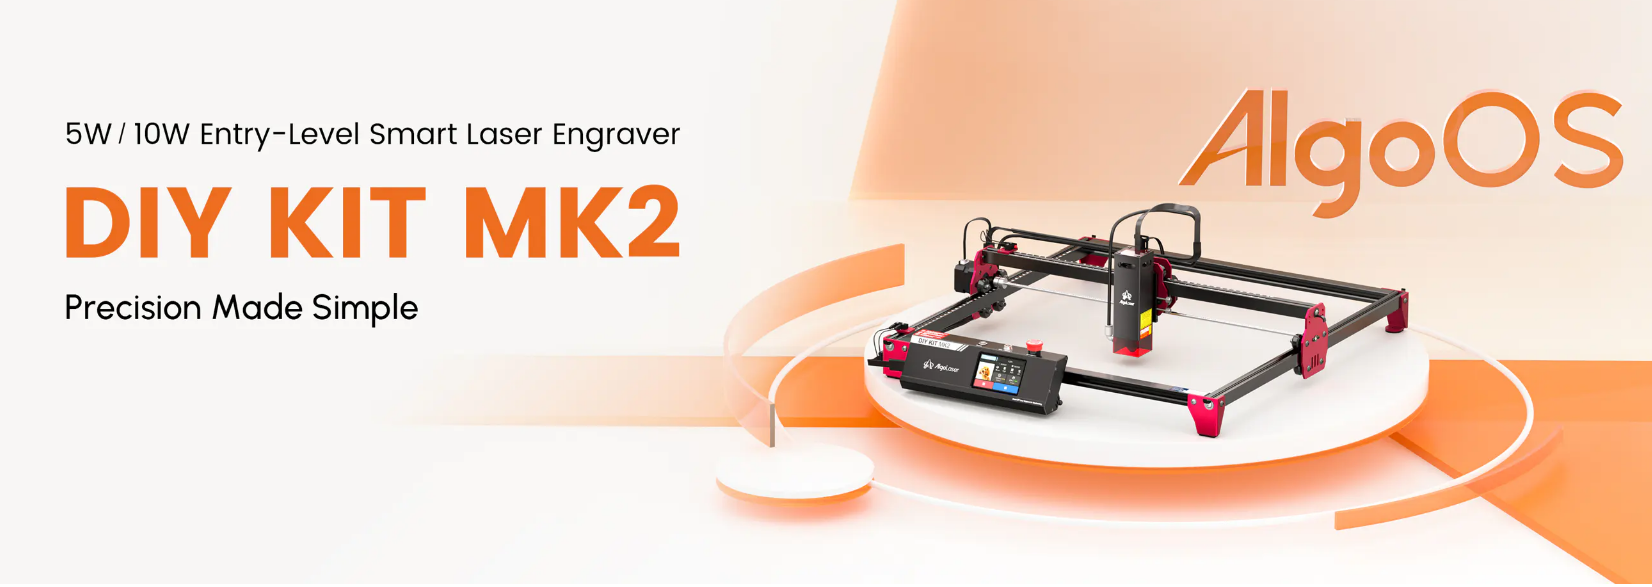
DIY KIT MK2
Experience unparalleled comfort, cutting-edge design, and performance-enhancing
technology with this latest innovation, crafted to elevate every journey.
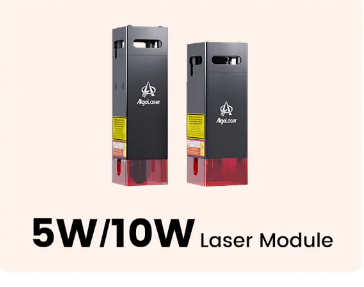


1. 5W/10W Laser Module
This indicates that the machine supports two types of laser power options: 5 watts or 10 watts. Higher wattage allows for stronger cutting and faster engraving.
2. Dual-Core CPU
The machine uses a dual-core processor, which means it has two processing cores. This makes the system faster, smoother, and able to handle complex tasks without lag.
3. 0.01mm Accuracy
The laser can engrave with very high precision—up to 0.01 millimeters. This ensures clean lines, sharp details, and high-quality results.
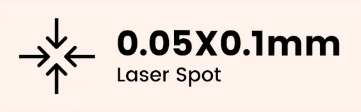
4. 0.05 × 0.1mm Laser Spot
This shows the size of the laser beam. A smaller spot means more detailed and clearer engraving, especially for photos and fine designs.
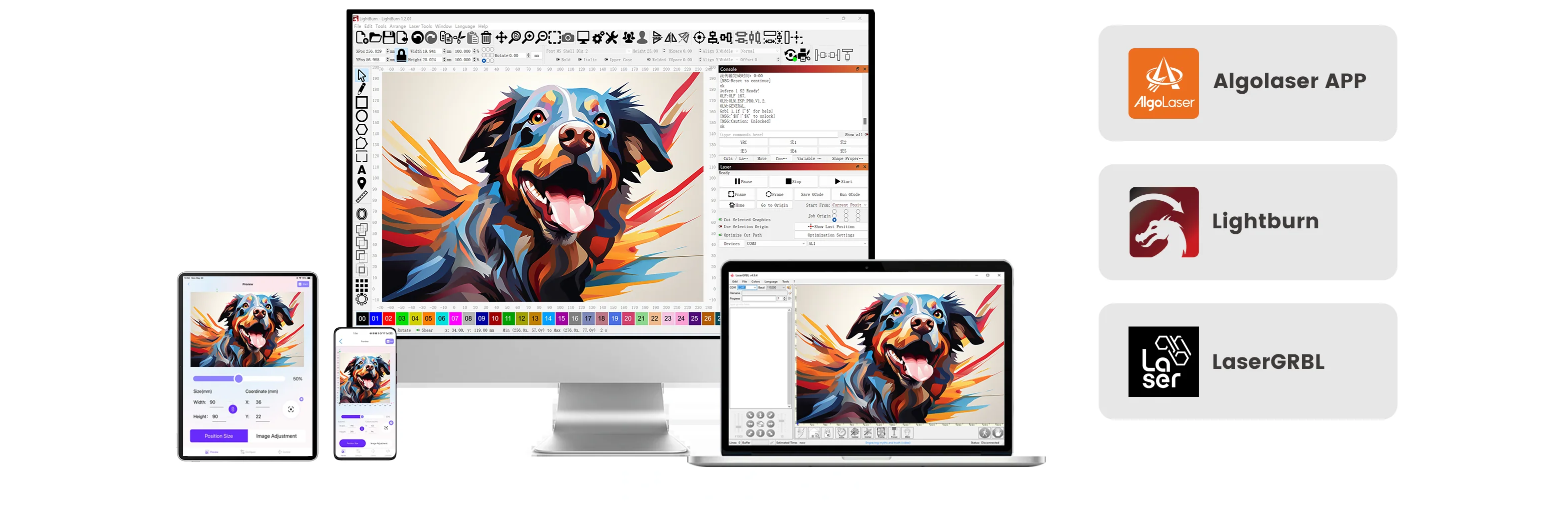
5. AlgoLaser App
There is a mobile app for controlling the machine. You can send files, adjust settings, and manage projects directly from your phone.
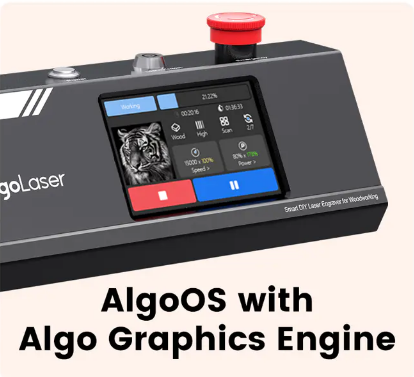
6. AlgoOS with Algo Graphics Engine
The machine has a built-in operating system called AlgoOS, including a graphics engine.
It allows you to preview images, adjust designs, and control the laser directly on the screen.
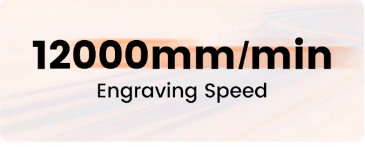
7. 12000 mm/min Engraving Speed
The machine can engrave at a very high speed—12,000 millimeters per minute—which helps finish jobs faster while keeping quality.
8. Highly Compatible
The machine works well with many software programs, devices, and file types. It can connect easily and accept different design formats.
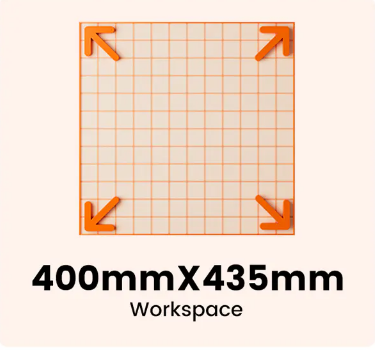
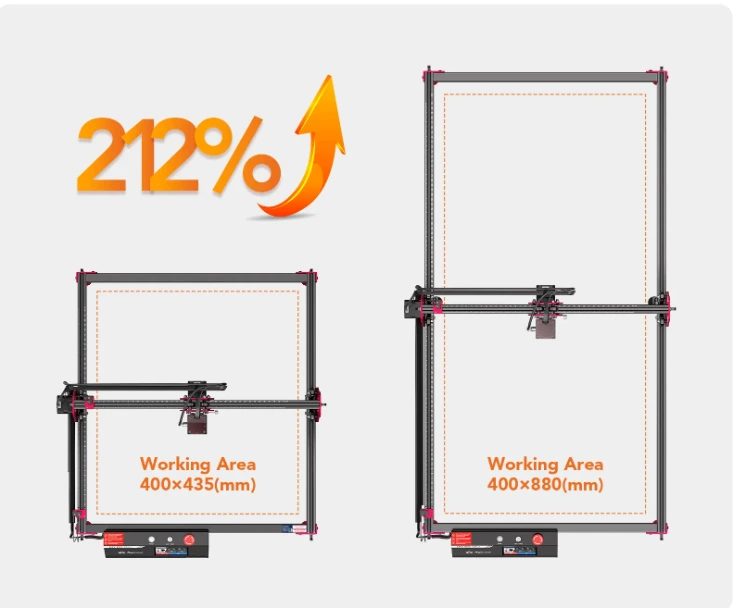
9. 400mm × 435mm Workspace
This is the engraving area size.
You get a large working space (400 by 435 mm), allowing you to engrave bigger items or multiple items at once.
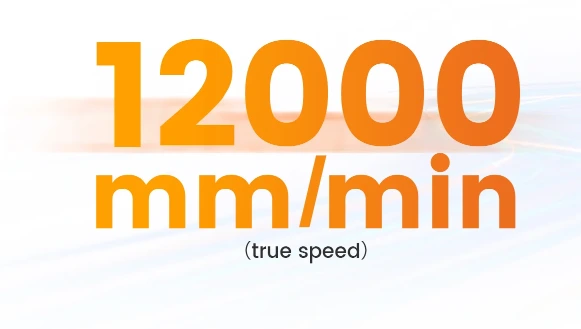
The machine can engrave at a very high speed—12,000 millimeters per minute—which helps finish jobs faster while keeping quality.
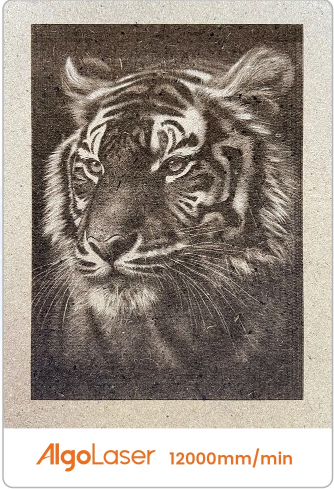
AlgoLaser 12000mm/min.
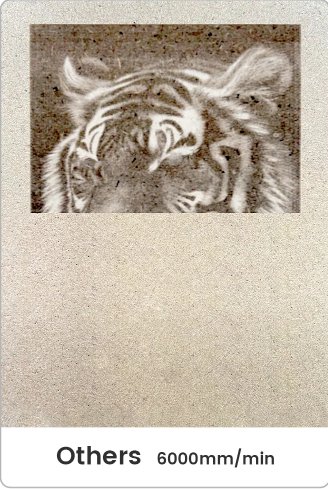
Others
6000mm/min.
Engrave All The Details You Create
Powered by a 5W/10W laser module, the DIY KIT MK2 delivers exceptional accuracy, capturing even the finest details in your designs. Each project will stand out with precision and craftsmanship, allowing you to showcase the full potential of your creativity and impress your clients.
0.01mm movement accuracy
Reaching new heights together
Ultra-fine 0.05 x 0.1mm laser spot
Where ideas come to life
Larger Workspace, More Projects
Expand your workspace by over 200% with the extension kit, increasing the area to 400mm*880mm. Maximize productivity, handle more orders simultaneously, and unleash your creativity like never before.

Highly Compatible, Perfect for Beginners and Pros
The DIY KIT MK2 offers unmatched versatility across popular engraving software. Whether you use LightBurn, LaserGRBL, or our AlgoLaser App, it integrates effortlessly into any workflow, catering to both beginners and seasoned professionals.
. Rear Panel Assembly This is one of the main structural pieces of the machine's frame. It typically holds the gantry (X-axis) in place, ensures the machine is square, and may house components like the main power inlet or cable management ports at the back.
. 2X-Axis Assembly This is the beam/rail on which the laser module (component #4) is mounted. It enables the laser module to move horizontally (along the X-axis). This movement is crucial for covering the width of the material being engraved or cut.
. 3Control Box This is the brain of the laser engraver. It contains the motherboard (controller board), which runs the firmware (like AlgoOS and GRBL), manages all the motor drivers, processes commands from the software (like LightBurn), and often includes ports for USB, power, and accessories. It may also house a touch screen for standalone operation (as seen in product descriptions).
. ALM-10BD Laser Module This is the core component that performs the work. The ALM-10BD is a 10W optical power blue diode laser module using dual-beam compression technology for a fine spot size (around $0.05 \text{ mm} \times 0.1 \text{ mm}$), enabling precise engraving and cutting through materials like wood and acrylic. It often features a built-in air assist nozzle to improve cut quality.
. Laser Goggle A critical safety accessory. These are designed to filter out the specific, harmful wavelength of light emitted by the laser module (typically around $455 \text{ nm}$ blue light) to protect the user's eyes from accidental exposure.
. Power Cable The standard cable used to connect the Power Adapter (component #7) to the main electrical wall outlet, supplying electricity to the machine.
. Power Adapter This converts the high-voltage AC electricity from the wall outlet into the low-voltage DC power required to run the Control Box, motors, and the Laser Module (e.g., $24\text{V } 1.7\text{A}$ for the 10W module).
. Left Y-Axis Assembly A primary structural rail that defines the depth of the machine's work area. It provides the smooth linear movement for the entire X-axis gantry, allowing it to move forward and backward (along the Y-axis).
. Front Assembly The front structural piece of the frame, similar to the Rear Panel. It connects the Y-axis rails (#8 and #10) at the front and completes the overall rectangular structure of the machine.
. Right Y-Axis Assembly The mirror image of the left Y-Axis Assembly. It works in tandem with the left side to ensure stable, parallel movement of the gantry along the Y-axis.
